March 2014 – Part 1

Quite a lot going on this month (now writing in present tense!) As I write this we’re just over halfway through the month. It’s all going on, inside and outside the house. I’ll split March into several blog posts. This post, I’ll split into two sections – inside and outside.

Inside the house

The screed is drying nicely so it’s now ok to walk on. The stud work for the downstairs study, cloakroom and utility has gone up, so we can now get an idea of the final layout of the house. We made a couple of tweaks to one of the sections of stud work, to improve the flow through the house. In the entrance hallway, we were all in agreement to take a corner of the stud work of the cloakroom off. It makes the space a lot more useable, without really sacrificing any space in the cloakroom. I think it’s important to be on site to see these things, as it didn’t seem an issue looking at the plans, but when on site, we mocked up the planned position of the wall, and it just didn’t look right.

IMG_2120 IMG_2121

Sean, the electrician was on site doing his first fix, running all the necessary cables. I think even Sean was surprised at the amount of cable that went into the house for the first fix. We’ve opted for LED down lighters in the kitchen, bathrooms and man cave, and standard lighting everywhere else, to try and keep the cost down a bit. We also had a meet up with the guys from Aperio Audio Visual, Craig and Chris and talked through my requirements for the home cinema set up. The set up will also include all the cabling to each TV, along with a speaker system in certain areas of the house that can be zoned.  I’ll try my best to make sure this is all rigged up ready for the house warming party!

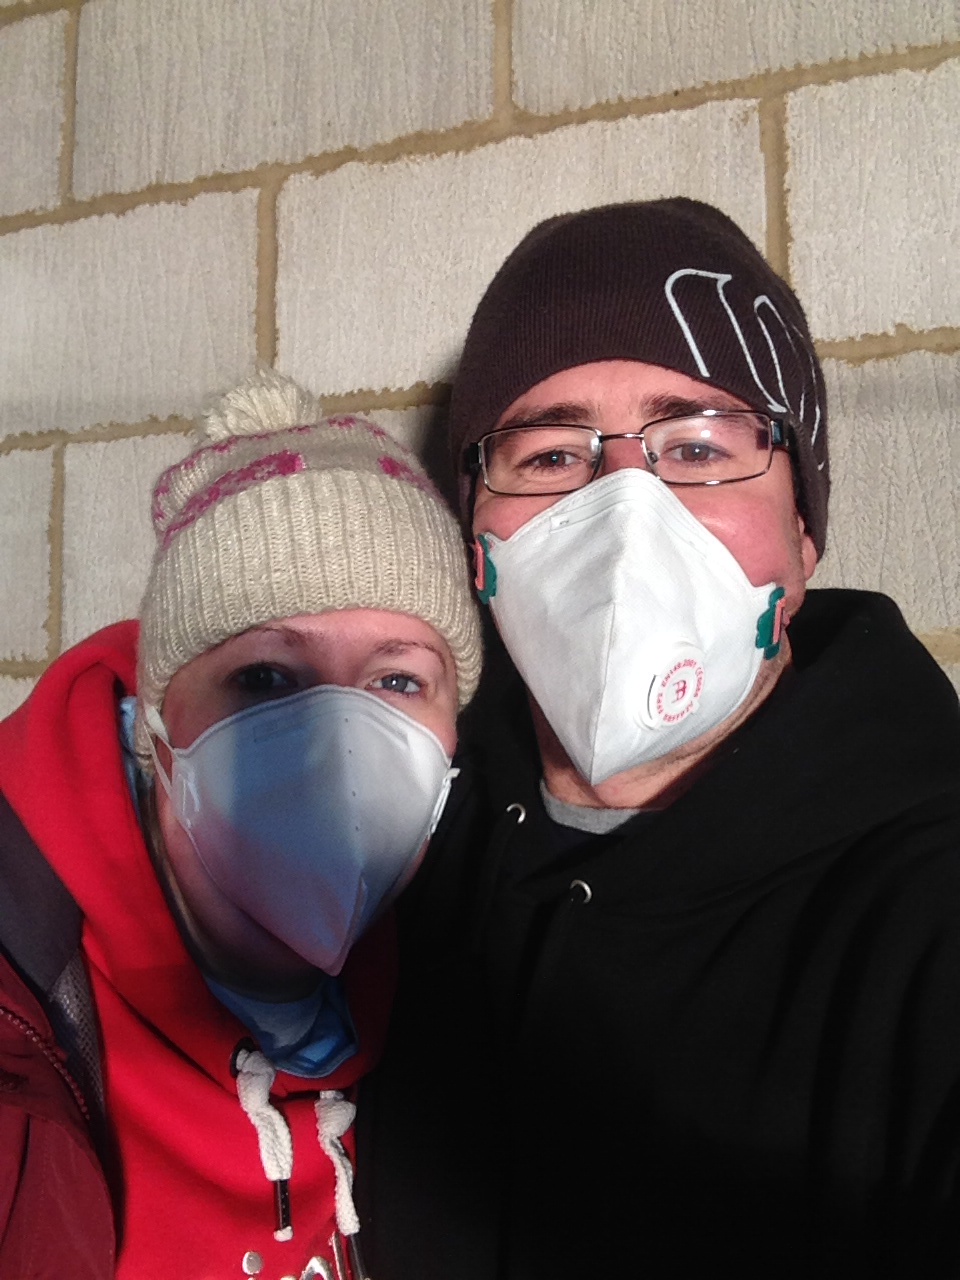
More insulation to be done, in all the roof spaces with fibreglass insulation, a horrible task, so I thought it best to delegate that part to my trusty right hand man (thanks Colin!).  Because we’re having open eaves, we had to stuff the insulation into all of those gaps as well. Back up on the top floor, we finished off fixing the ply to the inside of the trusses, this acts as extra bracing, then another 50mm of Recticel insulation was fixed to that ply, ready for the plasterboard.

We ‘dry fitted’ the shower trays so we could fit the waste pipe work to each of them. We’ve just got a days work left doing all the odds and ends ready for it to be dry lined. Hopefully by the time I next write, the rain water harvesting system would’ve been delivered then that’s everything done for the first fix plumbing.

Outside the house

A good tidy up was needed out the front of the property to clear space for the ground workers to return to dig the trenches for the BT and electricity cables to be run. This required moving another few tons of stone out of the way that we’ve got remaining to build our retaining wall out the back.

IMG_2057 IMG_2058

The second pic (believe it or not) is the ‘after’ clean up shot. There were a few pallets of stone there before we got stuck in! Our little helper getting stuck in as well.

Once the trench was back filled we could get it looking a little bit more like a house, and get shot of some of the unsightly fencing.

IMG_2116 IMG_2115 IMG_2119

The drive got it’s layer of scalpings, which made parking a lot less muddy!

IMG_2140 IMG_2141

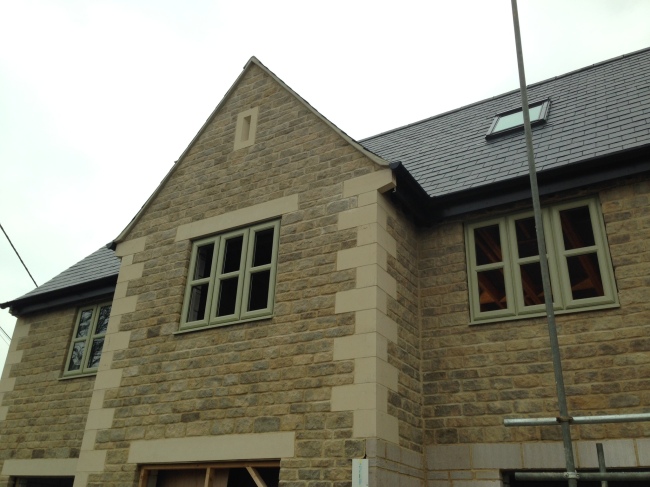
The garage floor was also completed at the same time, so that’ll come in handy as bit of extra storage. It’s slowly starting to look like our home!

Next time – more work on the first fix inside for the cabling for all the TVs and the conservatory gets fitted too.

If you’re interested in building your own home, or need any advice from planning issues to renewable energy, be sure to check out http://theselfbuildsite.com

theselfbuildsite.com

Thanks for reading – see you next time.

Dom.

February 2014

Time to insulate the ground floor in preparation for fitting the underfloor pipe work. This turned into quite a lengthy process, as it involved fitting the following:-

  • 1200 gauge damp proof membrane (that had to be taped round every edge of the room to the existing dpc)
  • 150mm Recticel insulation (this was slightly warped, which made the fitting tricky!)
  • taping the insulation joins with foil tape
  • fitting a foam expansion strip around the insulation against the walls
  • fitting a 500 gauge vapour check barrier over the insulation

IMG_6429 IMG_0424_2 IMG_1744


After finally getting the whole of the downstairs prepped (we lost count of how many times we had to move all the insulation around to clear the room we were working on!) We could then start insulating it with the 150mm (slightly bent) Recticel.

IMG_0456_2 IMG_1829


Once we’d insulated the floor in every room, we could then lay the vapour check barrier and the expansion strip.  A little tip here – try and leave  a tiny gap from the insulation to the wall, to fit the expansion strip in, this’ll save you a lot of time when you come to fit the strip (as we found out the hard way!)

It was then finally time to lay the UFH pipe work, supplied by ‘Wundafloor’ this was a doddle to fit, and will definitely be using them again on client’s properties.

IMG_1897 IMG_1907


Just the conservatory floor to prepare and lay the UFH pipe work down on now. The conservatory isn’t actually there yet, so we had to knock something up to keep the area dry ready for the screed. I’m sure you’ll agree from the picture below – it’s a beauty, we’re thinking about keeping it to save a few quid! I joke, I joke.

IMG_1892


Nailed it!!

Having that sheet up allowed us to get the floor sorted in the dry (it’s still there as I type, as we’re waiting for the conservatory to be fitted in a couple of weeks.)

All the underfloor heating system was now pressure tested for leaks. None were found so we could now get the screed down – which was a small milestone as once that had dried, we could then get the staircase manufacturer out for his final measurements. That means we won’t have to keep going up the never ending ladder very soon – result! We’ll also be able to start the dry lining – so it’s really starting to feel more and more like a house, as opposed to a building site! A couple of pics of the screed finish – very smooth, the screeder (made up word?!) was recommended to us by Tom our chippie, so we knew we would be getting a good finish.

IMG_1930 IMG_1931 IMG_1933 IMG_1942


What’s next? Wait for the screed to dry before we can get back in. A blessing in disguise I think, as it gives me chance to concentrate on my business for a week. Then back to connect up the heat recovery ducts.

Thanks for reading. Just a quick note to say I have a bit of exciting news – a new venture that I’m working on http://www.theselfbuildsite.com it’s a site I’m creating to help self builders save money and find everything they need to help them with their build in one place. It’s currently under construction, but if you’re interested in self building, or any aspects of renovation or construction, be sure to go to the site to register your interest for the upcoming launch date.

top red

January 2014 (cont.)

On to a bit of plumbing. With most of the stud work now complete, we could crack on with laying the underfloor heating for the first floor. This is made up of an ‘overboard’ system supplied by www.wundafloorheating.co.uk  Very easy to fit, just a bit fiddly to cut the boards to make the tricky pipe runs.

Image

ImageImageImage

A sheet of 6mm ply is then fitted over the board and the pipes. Ready for the carpet to be laid later on.

A couple of pics from the attic rooms now, the ‘man cave’ now has all the stud work in place, including the stud wall that will house the TV and all the other electrical wizardry. We also thought it’d be a good idea to put one of the extractors for the heat recovery system in there (behind the stud wall that houses the TV) as it’s bound to get quite warm with all the various pieces of equipment.  My wife has now claimed the other room as hers, so the rooms are all now spoken for!

ImageImage

The Mechanical Heat Recovery and Ventilation Unit is a bit of a beast, it’s going to have a large cupboard all to itself! Should be tucked nicely out the way though – looking forward to connecting that up as I’ve not done one of these units before.

Most of the first fix for the plumbing work is now done, approximately 70% of the way through it. The last bit to do is fit all of the ground floor underfloor heating. But before we can lay all the pipe work for that, we need to lay a thick damp proof membrane, followed by 150mm of insulation, then a vapour check barrier, THEN the pipe work can finally be laid! This will all happen next month – stay tuned as we’ll nearly be up to date – wooooooooooooo.

January 2014

Haaaaaaaaaaappy New Year! Where did that last year go? The same place as the one before, the past! Anyway, I hope you all had a great Christmas. Let’s build a house – crack on!

Where were we? Ah yes, insulating the roof space. After doing a day in here, I started to resemble a snow man! This stuff gets everywhere! 

Image

This was a thankless task, especially trying to fit it in around my own work. Luckily we had a helping hand to save the day (thanks Colin!) A look out of the Velux window soon gave me that motivational kick up the arse, what a lovely view. We can’t wait to be greeted with this every day.

Image


The site got a little bit damp during the heavy rain we had in January (side note – nothing in comparison to those currently suffering in Somerset – Feb’14). This was mainly down to not having the drainage in place yet or the guttering terminating into the storm drain. (This will be done if it ever stops raining).

ImageImage


Back to the inside of the house now. Tom started cracking on with the stud walls. We could now get a feel of the size of the rooms. It’s all starting to take shape.

Image


Tom was very busy this month, him and Clint then got the roof fitted to the bay window, this took some doing, thanks guys! 

Image


Fiiiiiiiiiiiiiinally, I get to start the plumbing, well, sort of plumbing! Myself, Andy and Ant got all the ducting in place for the mechanical heat recovery and ventilation. Here comes a techy bit! Most of the manufacturers usually supply the ducting in 150mm diameter, this posed a problem for us, as our ‘easy-joist’ system only had gaps of 110mm. Luckily, Dan@AdaptEnergy managed to source a kit with 75mm ducting, so that solved that problem – thanks Dan! That’s the end of the techy bit – phew!

ImageImageImage


A stairway to heaven (heaven being the man-cave).

Image


I’ll split this blog into two parts – for two reasons:-

  1. I haven’t been very organised, and I’ve not uploaded the rest of the pictures from my phone to the iCloud (whatever that is!)
  2. We’ll soon be up to date and I’ll run out of things to say!! (stop cheering!)

See you all next time!

December 2013

Jingle Bells, Jingle Bells etc etc…..

Onwards and upwards! Carrying on with the doors and windows this month. Also the single storey roof was finished, after a few problems with the trusses, our super chippies managed to overcome this with a bit of forethought. A few pics of the first few days progress from this month….

IMG_0305_2 IMG_0306_2 IMG_0307_2

With the single storey roof completed, the last of the scaffolding could come down, and we could finally get to see what the house looks like – exciting times indeed!

Ta Da!

IMG_0325_2

Both my wife and I were extremely happy with our choices (I may have mentioned this already!) Everything was really starting to come together.

We chose a ‘stable door’ style for the utility. Well, we are in the countryside now!

IMG_0329_2

Nearly watertight! The next decision we had to make was choosing a sealant that would match the mortar, to seal around all the doors and windows (this still hasn’t been confirmed yet!) A few testers that we weren’t quite happy with.

IMG_0330_2

I’ll keep you all updated with the final choice of sealant colour (I’m sure you’ll all be on the edge of your seats until then!) As a side note, if anybody can recommend a colour, feel free to leave a comment below or email me at: aquatackler@gmail.com

Next was the front door to go in, again, Tom did a great job fitting this, and made sure to put extra fixings in, making it as secure as possible and to minimise any ‘wobble’.

IMG_0335_2 IMG_0336_2

The bay window next. We weren’t looking forward to fitting this, as we had a couple of issues with the block work. It all went in ok though, we just need to source some infill panels for the sides.

IMG_0343_2

IMG_0353

That took us up to Christmas.  It wouldn’t be Christmas in the countryside, without Santa on a tractor. So here you go!

IMG_0354_2

See you next time! If you’ve got any questions, feel free to leave me a comment and I’ll reply ASAP.

If you’ve enjoyed my blog, please feel free to share it.

November 2013

With the roof waiting for the tiles to go on, after the felt and battening, we could turn our attention inside of the house and think about getting the first floor chipboard down. Our chippie/window fitter/all round lovely guy Tom first got a ladder set up to the top floor – it’s a long way up there!

Image

Still waiting for the new tiles to arrive!!

Image

They’ve arrived!! Hooray! They look a lot better than the first dodgy batch of tiles. Next job, get them on top of the scaffolding. The electric hoist was a bit on the heavy side, we managed to convince the delivery driver of the tiles to lift it up on to the scaffold with his crane – thanks Mr Delivery Driver!

Don’t look down!

Image

The hoist in action! Jake loading, me unloading – sorted!

Image

It took us all weekend to load out the tiles for the main roof, I think it was about 2000 in total, from memory.

Tony, the roofer, came back to get the garage roof done, the tiles looked amazing once fitted, we were all extremely happy with the finished result.

ImageImage

Once the garage was completed, they got stuck in to the main roof on the house, with the extra pitch on the rear of the house, it was really looking quite smart, if I do say so myself!

ImageImage

It didn’t take the roofers long at all to get the house finished, we even had a sunny day for me to take a pic of the front.

Image

With the roof now complete, we could now start insulating the trusses from inside. What a messy job this turned out to be!

Self(ie)Build!!!

ImageImage

Next exciting stage of the build for us – the windows and doors arrived! After much discussion and mind changing on the colour of the frames, we finally settled on a colour, ‘Stone White’ from Farrow & Ball. It’s a lovely ‘Cotswoldy’ Green. We really like the colour alongside our choice of stone and mortar.

Image

ImageImageImageImage

That takes us to the end of November – a very productive month, and nearly water tight! Next month, the single storey ‘lean to’ kitchen roof goes on (with a  minor hiccup).

Thanks for reading. Feel free to ‘like’ or comment 🙂

October 2013 (cont.)

Roof tiles! This was the next hurdle to overcome. We’d decided on a Chinese Natural Slate as we managed to get a good deal on them. However, after they were delivered and we’d started loading them out on to the scaffolding, it was becoming more and more apparent that there were a few issues. The first issue was the lack of uniformity in thickness of the slates, and the other issue was the quality – a large proportion of them were broken. I think how they were packed was one of the main reasons for the high amount of breakages, the pallets were awful.

After spending the best part of a day loading these out (sore arms from winching them up in a bucket by hand!) We then had to get them all back down, as the roofer said it’d be pointless fitting such poor quality tiles. This obviously delayed us as we had to get these tiles returned, (hadn’t paid for them at this stage anyway) and then source a better quality tile. These were so much better in comparison. We decided to hire an electric hoist for the weekend to get the tiles up to the roof ready to be fitted. This bit of kit was an absolute god send!

Bad quality Chinese slate below:

ImageImage


The wait on the delivery of the better quality tiles, took us into November, a bit of panic started to set in as we really wanted to get the house watertight by now, for obvious reasons. See you next time.

October 2013

All the trusses are on site and ready to go – let’s raise the roof! (see what I did there?!) This is the second attempt at putting the roof on, after the hassle we had the first time round with the crane, this time every thing went as planned – phew! Three chippies + lots of trusses =

ImageImageImage


The next few pictures are where things start to get a bit more exciting for me. The main reason being – THE MAN CAVE! My lovely wifey has let me have one of the attic rooms as a home cinema/games room/escape from the wife room. So, seeing this take shape really perked me up, as all the stress and long days was starting to take it’s toll a bit, whinge, whinge, whinge. LOOK AT THE MAN CAVE!

Image


The half of the attic closest to the camera will eventually be mine! We’ve not decided what to do with the other half of the attic yet – watch this space!

We originally purchased the plot with detailed planning permission already in place, however we tweaked the plans to suit our needs. One of the changes we made was to make the attic space liveable rather than just a loft for storage. This meant changing the original trusses to attic trusses and increasing the pitch of the roof from the original 35 degrees to 50 degrees. Our (inherited) architect failed to notice the knock on effect this would cause with the corbels on the corners of the house. After increasing the roof pitch angle, it meant the lower part of the roof would clash with the end of the corbels. We had to ask the builder to cut 110mm off the ends of each of the corbels so the roof would fit. This then exposed the two supporting steel rods running down the centre of the corbel, so we then had to pay for a company to come and reface the cut ends to cover the exposed steel. Phew! “You’re so lucky, I’d love to build my own house!” I do smile to myself every time I hear this now :-).

Image


These were to be refaced at a later date. 

Next, more staining of the ends of the trusses, just a bigger version of the garage – no need to stick a pic in here.

The site needed a really good tidy up, so my wife and I got cracking, on a day that gave us a bit of everything, weather wise.

Image


Image


With the trusses complete, it was back in the builders hands to finish the gable ends. The rain delayed play a bit with this, but they managed to get them done as soon as the rain stopped. With the gable ends done, the house was really starting to look quite special.

Look at that chimney! Swit Swoo!

ImageImageImage

Image


A fair amount of work took place during this month, so I’ll split it into two blog entries. To be continued…..

September 2013
The garage brickwork is now finished. The chippies got in straight after to fit the roof trusses, all in the dry weather, so no delays here – splendid!

20140129-210938.jpg

Is anybody in there?!

20140129-211415.jpg

Second week of September, the trusses for the main house arrive. These were rather heavy! It took four of us to unload these and find somewhere to store them – awkward to carry, and a bit top heavy!

20140129-211816.jpg

20140129-211902.jpg

Off topic! I took a rare few days off to go angling with a good mate of mine. Was nice to get away from ‘the all consuming house build’ for a bit, kickback and relax – until my umbrella decided to leak!

20140129-212545.jpg

Back to the build. The scaffold was erected inside the house, ready for the chippies to start fitting the trusses.

20140129-212801.jpg

We had an issue with the first attempted lift of the trusses. The crane operator refused to lift the trusses, even after we’d had a site survey by the crane company, claiming that he wasn’t happy with the proximity of the overhead power cables. This wasted a day on site, not only for the 3 chippies, but we also had to rebook the crane. Before rebooking the crane, we arranged for Southern Electric to meet with the crane company on site. The Southern Electric guy informed us that the cables are all sufficiently insulated anyway, so there was no issue with the proximity of them. We rebooked the crane in, the fight for some form of compensation is still ongoing – watch this space!

My wife and I stained all the ends of the trusses on the garage as these will be part of the open eaves, so they’ll be seen from below.

20140129-213529.jpg

Total Overspend £300.00 Labour costs + (awaiting compensation)

Next month, attempt 2 at lifting the trusses on to the house………

August 2013

Finally time for the building work on the house to start! While waiting for the block and beam materials to arrive, it gave me chance to run the mains water pipe in to position. We’d already decided the kitchen layout, so I made sure the incoming mains came up directly below the kitchen sink.

We were really lucky with the weather, this enabled the brickies to crack on with the build, before we knew it, the scaffolding was going up as well!

20140127-200423.jpg

20140127-200515.jpg

The RSJ’s arrived along with quite a few other materials, so these were secured in the lockup, ready to be fitted at a later date.

20140127-200725.jpg

Over the course of the next week, (bearing in mind the guys were only doing weekends), they got a lot done. We could really start to see the sizes of the rooms, and it actually felt like we were making good progress, after all the previous delays we’d had.

20140127-201112.jpg

20140127-201133.jpg

20140127-201222.jpg

20140127-201254.jpg

After looking at the fireplace, we decided it was a bit on the large side, and overpowered the room somewhat. So we had a discussion with the builder, and agreed to make it a bit smaller, this was the only set back at this stage.

The following weekend, they were up to the next lift on the scaffolding, it was actually starting to look like a house now, and really started to sink in what we had taken on!

20140127-201613.jpg

20140127-201647.jpg

A few days later, the chippies were there to start fitting the first floor joists. I gave one of the guys a hand lifting them up in to place. One of the biggest joists took some lifting! All of these went in without any drama.

20140127-203502.jpg

20140127-203528.jpg

That’s it for the month of August.

Total Overspend £277